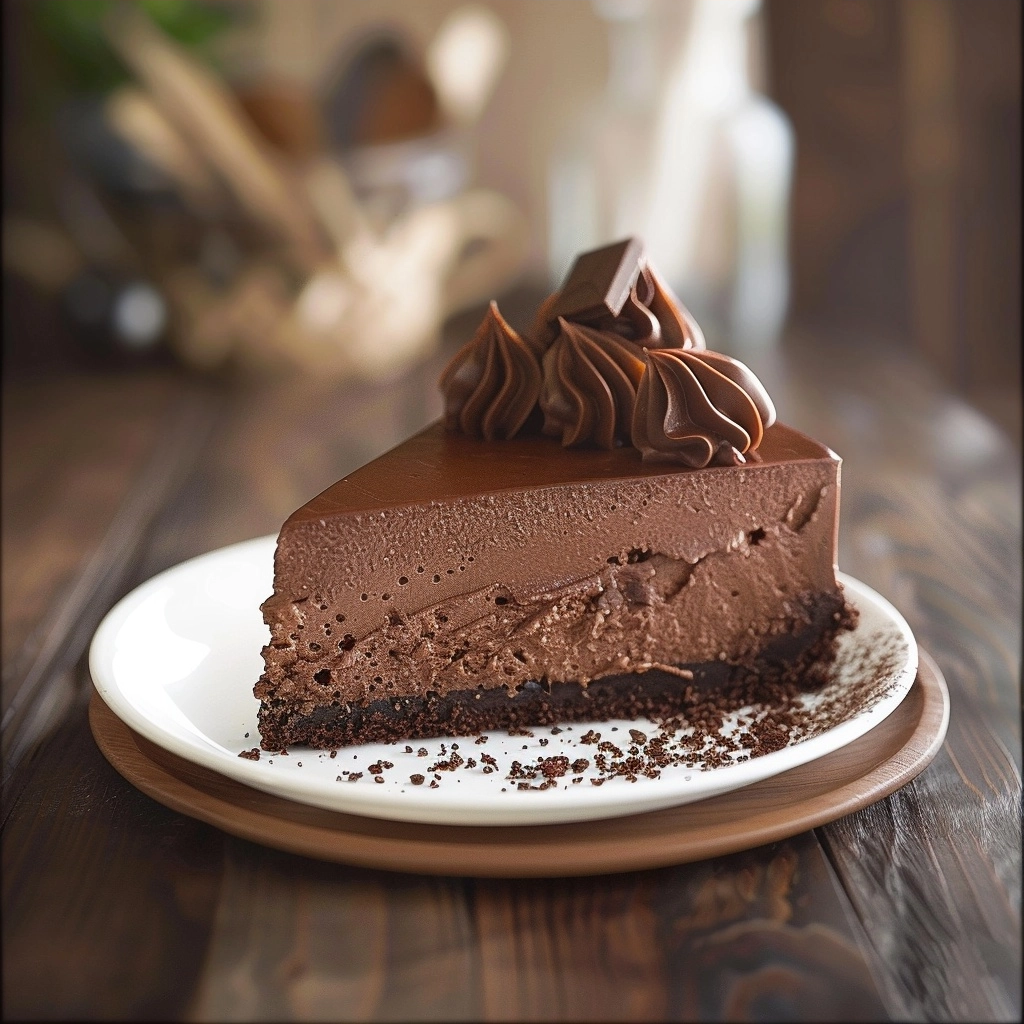
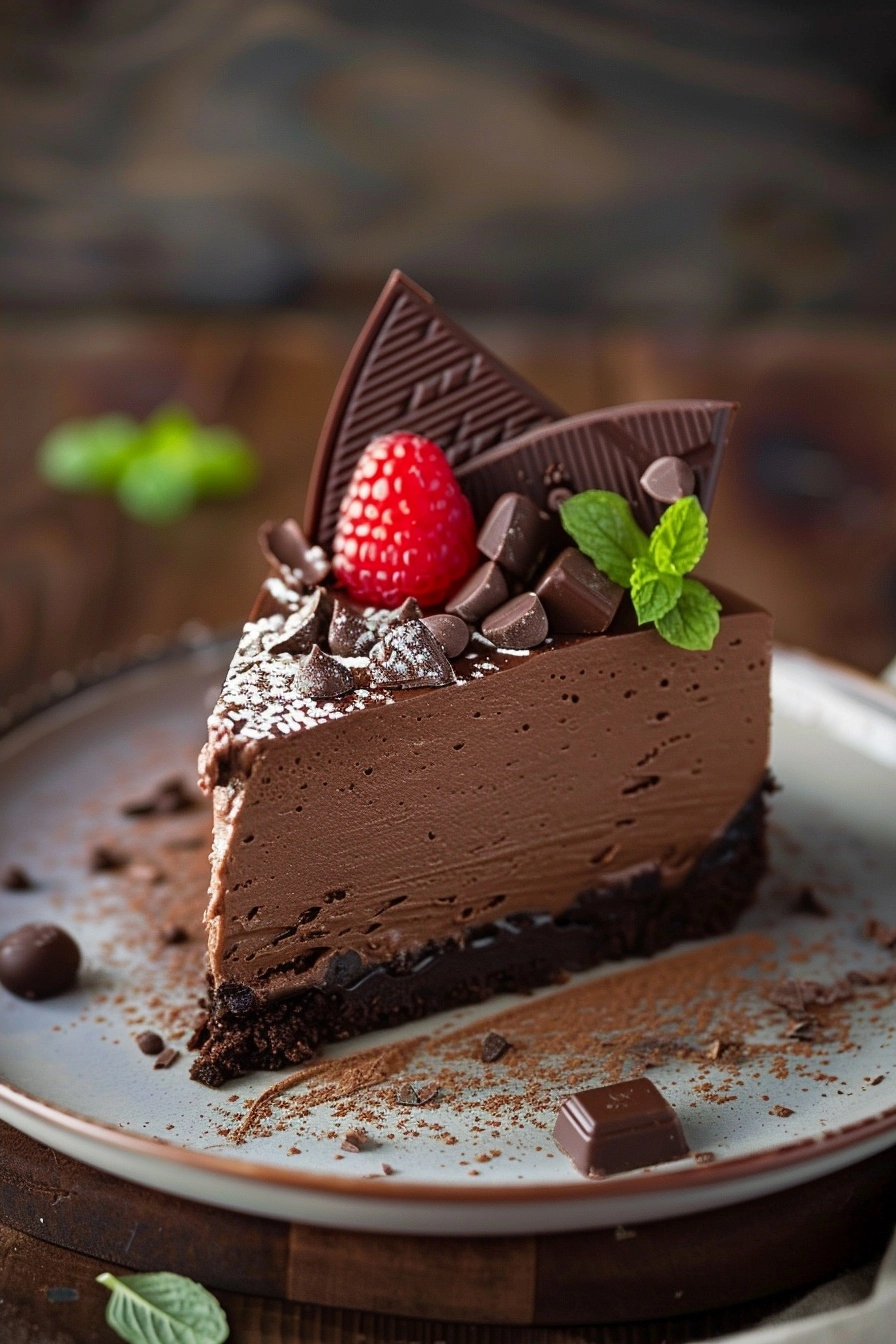
Perfect chocolate cheesecake provides a decadent, silky experience that satisfies the most intense cocoa cravings in every single bite. This chilled dessert features a rich, velvety ganache base paired with a crisp cookie crust that remains consistently firm. Achieving the right balance of sweetness and texture requires precision in ingredient temperature and chilling time for the best results.
Recipe Overview
| Prep Time | 30 minutes |
|---|---|
| Cook Time | 0 minutes |
| Total Time | 6 hours |
| Servings | 12 slices |
| Difficulty | Easy |
| Cuisine | Modern Dessert |
Why This Recipe Works
This recipe succeeds because it eliminates complicated water baths and long bake times often associated with classic cheesecakes. I developed this version to capitalize on the natural set of quality chocolate and cream cheese, resulting in a reliable structure that holds its shape perfectly when sliced.
My experience testing various ratios ensured the chocolate flavor stays prominent without becoming overly heavy or waxy. You achieve a professional result at home using standard kitchen equipment, which makes this an incredibly accessible recipe for anyone seeking a sophisticated sweet treat.
Ingredients
| Ingredient | Quantity | Notes |
|---|---|---|
| Cream Cheese | 24 oz | Ensure room temperature |
| Semi-Sweet Chocolate | 12 oz | Use high-quality bars |
| Heavy Cream | 1 cup | Full fat is necessary |
| Granulated Sugar | 3/4 cup | Fine sugar dissolves best |
| Chocolate Wafers | 1.5 cups | Crush into fine crumbs |
| Unsalted Butter | 6 tbsp | Melted completely |
Step-by-Step Instructions
Preparing the Crust
- Combine crushed chocolate wafers with melted butter in a medium mixing bowl until it reaches a sandy consistency.
- Press the mixture firmly into the bottom and slightly up the sides of a 9-inch springform pan using the back of a glass.
- Chill the crust in the freezer for 15 minutes to allow the butter to solidify properly.
Creating the Filling
- Melt the semi-sweet chocolate in a heatproof bowl using the microwave in 30-second intervals until completely smooth.
- Beat the room temperature cream cheese and sugar in a large stand mixer until the texture appears perfectly fluffy.
- Pour the melted chocolate into the cream cheese mixture while the mixer runs at a low speed.
- Whip the heavy cream in a separate chilled bowl until stiff peaks form and then gently fold it into the chocolate base.
Chef Tips for Perfect Results
- Use room temperature cream cheese to prevent lumpy filling that compromises the final mouthfeel of your dessert.
- Select high-quality chocolate bars rather than chips to ensure a smoother melt and superior flavor profile.
- Run a warm knife under hot water before each cut to achieve clean, sharp slices every single time.
- Adjust the chill time to at least six hours to guarantee the fats set firmly for easier serving.
Common Mistakes to Avoid
- Overmixing the cream cheese leads to excess air bubbles that create an uneven texture throughout your perfect chocolate cheesecake.
- Using cold ingredients prevents the emulsion from forming correctly, which leaves grainy spots in the finished filling.
- Rushing the chilling process results in a soft, messy slice that lacks the intended structural integrity.
- Failing to press the crust tightly enough usually causes the base to crumble during the removal phase.
Variations and Substitutions
| Ingredient | Substitution | Impact on Flavor |
|---|---|---|
| Semi-Sweet Chocolate | Dark Chocolate | Increases bitterness and depth |
| Chocolate Wafers | Graham Crackers | Adds a mild toasted vanilla note |
| Granulated Sugar | Maple Syrup | Introduces complex caramel undertones |
Serving Suggestions and Pairings
Serve this dessert alongside fresh raspberries to provide a bright acid contrast to the rich chocolate density. It pairs exceptionally well with a hot cup of black coffee or a chilled glass of sparkling cider for celebratory events. Hosting a dinner party usually requires a garnish like shaved chocolate curls or a light dusting of cocoa powder for an elegant presentation.
Storage and Reheating
| Method | Duration | Instructions |
|---|---|---|
| Refrigerator | 5 days | Keep in an airtight container |
| Freezer | 1 month | Wrap tightly in plastic wrap |
Nutritional Information
Approximate values per serving.
| Nutrient | Amount per Serving |
|---|---|
| Calories | 420 |
| Total Fat | 28g |
| Carbohydrates | 35g |
| Protein | 6g |
Frequently Asked Questions
Can I make this recipe in advance?
Yes, you can prepare the cheesecake up to two days before your event for maximum convenience. Keep it refrigerated and covered until the exact moment of serving.
How do I know if the cheesecake is set?
The texture feels firm to the touch and shows no jiggle when you gently nudge the pan. This indicates the fats have successfully stabilized at the recommended refrigerator temperatures.
Why did my chocolate seize during the melting process?
Seizing occurs when a small amount of liquid or steam contacts the melting chocolate during the heating process. Use a dry bowl and avoid high heat to keep the consistency smooth.
Can I freeze the cheesecake for later?
Freezing works well if you wrap the cake firmly in plastic wrap and store it in a flat container. Thaw the cake in the refrigerator for eight hours before slicing.
What is the secret to a smooth cheesecake surface?
Spreading the filling evenly with an offset spatula creates a perfectly flat top for your garnishes. Tap the pan once against the counter to remove any visible surface air bubbles.
Achieving the perfect chocolate cheesecake requires attention to detail but offers a reward of immense depth and flavor. By mastering the basic technique of mixing and chilling, you provide a professional quality dessert for your guests. Store your leftovers properly to maintain that dreamy, silky texture throughout the week. Enjoy the process of creating this classic, decadent treat in your own kitchen starting today.