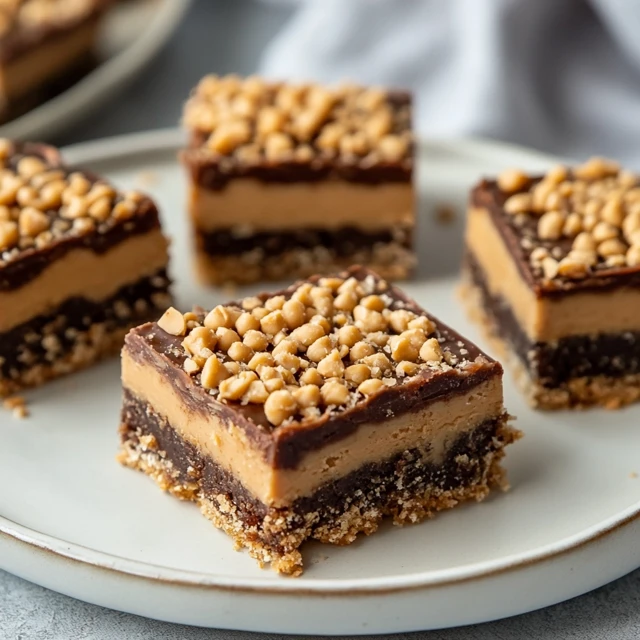
Peanut butter blossom bars are a delicious fusion of two beloved treats—classic peanut butter cookies and decadent dessert bars. These bars combine the rich, nutty flavour of peanut butter with a soft, chewy texture and a hint of chocolate to satisfy any sweet craving. They’re perfect for sharing at gatherings, indulging in during a quiet evening, or gifting to a peanut butter lover.
The Origins of Peanut Butter Blossoms
The iconic peanut butter blossom cookie has been a staple in many households since its creation in the 1950s. Traditionally, these cookies are peanut butter-based and topped with a single chocolate kiss, creating an irresistible combination. But what if you could take this classic and give it a modern twist? Enter peanut butter blossom bars.
By turning the recipe into bar form, you retain all the delightful flavours while making the process even easier. There’s no need to roll dough or shape individual cookies—just bake, slice, and serve.
Why Peanut Butter Blossom Bars Are the Ultimate Dessert
Peanut butter blossom bars are more than just a treat; they’re an experience. Here’s why they stand out:
- Ease of Preparation: Bars are quicker to bake than cookies, as the dough spreads evenly in a single pan.
- Perfect Texture: These bars have a soft, gooey centre with slightly crisp edges, creating a satisfying bite every time.
- Customisable Toppings: While the traditional recipe calls for chocolate kisses, you can experiment with peanut butter cups, white chocolate chips, or even caramel drizzles.
- Crowd-Pleasing Appeal: Their rich peanut butter flavour and chocolatey finish make them a hit with kids and adults alike.
For more ideas on customising desserts, you can explore creative cookie bar recipes.
Ingredients Needed
Before diving into the recipe, gather the following ingredients:
- 1 cup creamy peanut butter
- 1/2 cup unsalted butter, softened
- 1 cup granulated sugar
- 1/2 cup brown sugar, packed
- 2 large eggs
- 1 teaspoon pure vanilla extract
- 1 1/2 cups all-purpose flour
- 1 teaspoon baking powder
- 1/2 teaspoon salt
- Chocolate kisses or alternative toppings of your choice
Optional Add-ins:
- Crushed nuts for extra crunch
- Chocolate chips for a double-chocolate twist
- A pinch of cinnamon for warmth
Step-by-Step Recipe
1. Preheat and Prepare
Start by preheating your oven to 175°C (350°F). Grease a 9×13-inch baking pan or line it with parchment paper for easy removal.
2. Mix Wet Ingredients
In a large bowl, cream together the peanut butter, softened butter, granulated sugar, and brown sugar until light and fluffy. Add the eggs one at a time, beating well after each addition. Stir in the vanilla extract.
3. Combine Dry Ingredients
In a separate bowl, whisk together the flour, baking powder, and salt. Gradually add this mixture to the wet ingredients, stirring until just combined. Be careful not to overmix, as this can make the bars too dense.
4. Spread the Batter
Pour the batter into the prepared baking pan and spread it evenly using a spatula. The mixture will be thick, so take your time to ensure an even layer.
5. Bake to Perfection
Place the pan in the oven and bake for 20–25 minutes, or until the edges are golden and a toothpick inserted into the centre comes out clean.
6. Add Chocolate Toppings
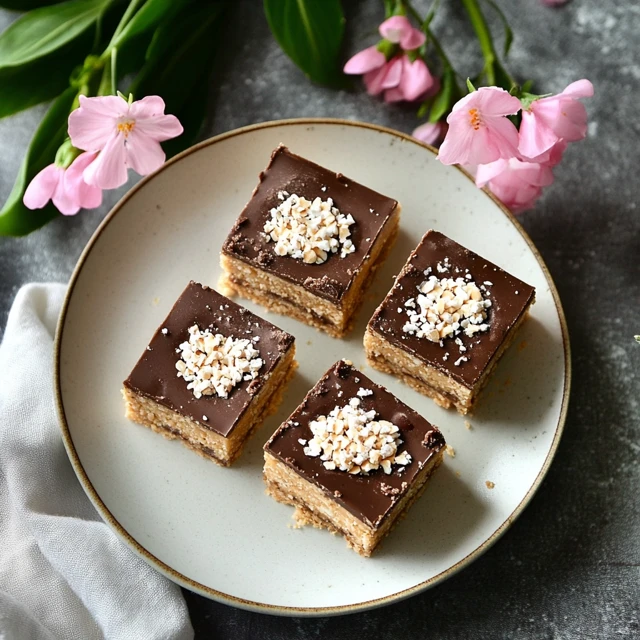
As soon as you remove the bars from the oven, press chocolate kisses or your chosen toppings into the surface. The heat from the bars will slightly melt the chocolate, creating a delectable topping.
7. Cool and Slice
Allow the bars to cool completely in the pan before slicing into squares or rectangles. For clean edges, use a sharp knife and wipe it clean between cuts.
Tips for the Perfect Peanut Butter Blossom Bars
- Don’t Overbake: To maintain a soft and chewy texture, take the bars out of the oven as soon as the edges start to brown.
- Use Quality Ingredients: Opt for pure vanilla extract and high-quality chocolate for the best flavour.
- Storage: Store in an airtight container at room temperature for up to a week or freeze for longer-lasting freshness.
For more baking tips, check out baking hacks for beginners.
Serving Suggestions
Peanut butter blossom bars are versatile and can be served in a variety of ways:
- Pair them with a scoop of vanilla ice cream for an indulgent dessert.
- Serve them alongside a hot cup of coffee or tea for an afternoon pick-me-up.
- Wrap individual bars in parchment paper and tie with a ribbon for a charming homemade gift.
Why You’ll Love This Recipe
If you’re a fan of easy-to-make, crowd-pleasing desserts, peanut butter blossom bars are sure to become a go-to in your recipe collection. They’re fuss-free, endlessly customisable, and packed with the comforting flavours of peanut butter and chocolate.
FAQs About Peanut Butter Blossom Bars
- Can I make these bars gluten-free? Yes! Substitute all-purpose flour with a gluten-free baking mix.
- What type of peanut butter works best? Creamy peanut butter creates a smoother texture, but chunky peanut butter can add a delightful crunch.
- Can I use margarine instead of butter? While possible, butter provides a richer flavour and better texture.
- Do I have to use chocolate kisses? No, feel free to experiment with other chocolates or toppings.
- How long do these bars stay fresh? When stored properly, they remain fresh for up to a week.
- Can I double the recipe? Absolutely. Use a larger pan and adjust the baking time slightly.
- How do I avoid overbaking? Check the bars a few minutes before the recommended time and remove them as soon as the edges turn golden.
- Are these bars suitable for gifting? Yes, they’re perfect for wrapping individually or packing in gift boxes.
- Can I freeze the bars? Yes, wrap them tightly in plastic wrap and store in the freezer for up to three months.
- Can I add other flavours to the recipe? Definitely! Consider adding a dash of cinnamon, nutmeg, or even a swirl of jam for a creative twist.
Peanut Butter Blossom Bars: Part 2
In this part, we’ll dive deeper into customisation, healthier alternatives, and practical tips to ensure your peanut butter blossom bars are perfect for every occasion. From exploring peanut butter varieties to troubleshooting common issues, these insights will elevate your baking game.
11. Peanut Butter Options
When it comes to peanut butter blossom bars, the type of peanut butter you use can significantly influence the flavour and texture.
Creamy vs Crunchy Peanut Butter
- Creamy peanut butter produces a smooth and even texture, ideal for those who enjoy a classic, melt-in-your-mouth experience.
- Crunchy peanut butter adds bursts of texture, giving your bars a delightful nutty crunch. If you prefer a mix of soft and crunchy textures, this is the way to go.
Alternatives to Peanut Butter
For those with peanut allergies or who simply want variety:
- Almond Butter: Adds a slightly sweeter, nutty flavour.
- Sunflower Seed Butter: A nut-free alternative with a rich, earthy taste.
- Cashew Butter: Creamy and subtly sweet, perfect for a milder take on the bars.
12. Making the Recipe Healthier
For a guilt-free twist on peanut butter blossom bars, you can make a few simple substitutions.
Reducing Sugar
- Replace granulated sugar with natural sweeteners like honey, maple syrup, or coconut sugar.
- Reduce the sugar by 25% for a less sweet but still satisfying treat.
Healthier Flour Options
- Swap all-purpose flour for whole wheat flour to add fibre and nutrients.
- For a gluten-free option, use almond flour or oat flour.
Low-Fat Peanut Butter
- Choose low-fat or natural peanut butter to cut back on calories and unnecessary additives.
13. Chocolate Variations for the Topping
While traditional chocolate kisses are iconic, there’s room for experimentation.
Different Chocolate Types
- Dark Chocolate: Adds a bittersweet contrast to the sweet bars, perfect for dark chocolate lovers.
- White Chocolate: Offers a creamy, sweet flavour that complements the peanut butter.
- Flavoured Chocolates: Mint or caramel-filled chocolates can add a surprising twist.
Mix and Match
For a playful appearance and varied flavours, top your bars with a combination of milk chocolate, dark chocolate, and white chocolate pieces.
14. Adding Texture with Mix-Ins
Adding mix-ins can elevate the bars by introducing new flavours and textures.
Popular Mix-Ins
- Chopped Nuts: Walnuts, pecans, or hazelnuts add crunch and a nutty depth.
- Oats: Rolled oats give the bars a hearty texture and boost fibre content.
- Chocolate Chips: Perfect for doubling the chocolatey goodness.
Balancing Mix-Ins
To prevent overpowering the bars:
- Stick to no more than 1 cup of mix-ins for a standard recipe.
- Evenly distribute mix-ins in the batter for consistent bites.
15. Peanut Butter Blossom Bars for Special Diets
Adapting the recipe for dietary needs is simple with a few substitutions.
Gluten-Free Alternatives
- Use almond flour or oat flour instead of all-purpose flour. Both add unique flavours and textures.
- Ensure your baking powder is gluten-free.
Dairy-Free and Vegan Options
- Replace butter with vegan butter or coconut oil.
- Swap eggs for flaxseed meal (1 tablespoon flaxseed + 2.5 tablespoons water = 1 egg).
- Use dairy-free chocolate for the topping.
16. Storing and Freezing the Bars
Proper storage ensures your bars stay fresh and delicious for days.
Storing for Freshness
- Keep bars in an airtight container at room temperature for up to 5 days.
- For longer freshness, store them in the refrigerator for up to a week.
Freezing Tips
- Wrap individual bars tightly in plastic wrap or foil.
- Place them in a freezer-safe bag or container, and freeze for up to 3 months.
- To thaw, let the bars sit at room temperature for 1–2 hours.
17. Serving Suggestions for Every Occasion
Peanut butter blossom bars are versatile and suit a range of events.
Perfect Occasions
- Parties and Gatherings: Arrange bars on a decorative platter for an eye-catching dessert table addition.
- Lunchboxes: Pack a square or two for a satisfying midday snack.
- Gifts: Wrap bars in parchment paper, tie with twine, and place in a festive box for a thoughtful homemade present.
Pairing Ideas
- Serve with a glass of cold milk, a warm cup of coffee, or hot cocoa for a comforting treat.
18. Scaling the Recipe for Different Needs
Whether you’re baking for a small group or a crowd, scaling the recipe is easy.
Adjusting Quantities
- Small Batches: Halve the ingredients and use an 8×8-inch baking pan.
- Large Batches: Double the recipe and bake in a 9×13-inch or larger pan. Adjust baking time slightly.
Consistent Results
- Maintain the same ratio of wet to dry ingredients.
- Spread the batter evenly to avoid uneven baking.
19. Creating Seasonal Versions of Blossom Bars
Bring a festive flair to your bars with seasonal adaptations.
Holiday Sprinkles
- Add red and green sprinkles for Christmas.
- Use pastel sprinkles for Easter or vibrant colours for birthdays.
Themed Chocolate Shapes
- Replace chocolate kisses with heart-shaped chocolates for Valentine’s Day.
- Use pumpkin-shaped chocolates for Halloween or egg-shaped ones for Easter.
20. Troubleshooting Common Problems
Even the best bakers face challenges. Here’s how to address some common issues:
Dry or Crumbly Bars
- Ensure you don’t overbake the bars.
- Use room-temperature butter and eggs for a smooth batter.
Chocolate Melts or Falls Off
- Press chocolate pieces into the bars immediately after baking, but avoid overhandling.
- Let the bars cool completely before transferring them.
Uneven Baking
- Spread the batter evenly before baking.
- Rotate the pan halfway through baking to ensure even heat distribution.
Peanut butter blossom bars are endlessly customisable and forgiving, making them a perfect dessert for bakers of all skill levels. Whether you’re trying new flavours, adapting for dietary needs, or preparing ahead, these bars are a guaranteed hit.
Peanut Butter Blossom Bars: Part 3
In this final section, we’ll explore fun ways to elevate your peanut butter blossom bars with creative ideas, unique variations, and practical tips. Whether you’re baking with kids, preparing them as gifts, or experimenting with no-bake options, there’s always room to innovate with these versatile bars.
21. Making the Bars with Kids
Baking with children is a wonderful way to spend quality time while teaching them useful skills. Peanut butter blossom bars are an excellent choice for young bakers because they’re straightforward and offer plenty of hands-on activities.
Tips for Involving Children
- Prepare Ingredients in Advance: Measure out the ingredients beforehand so kids can focus on mixing and spreading.
- Use Kid-Friendly Tools: Equip them with lightweight bowls, spatulas, and mixing spoons that are easy to handle.
Tasks for Young Bakers
- Spreading the dough evenly into the pan with a spatula.
- Pressing chocolate kisses or other toppings onto the freshly baked bars.
- Decorating with sprinkles or drizzled chocolate.
Baking together can be both fun and educational, helping kids learn about measuring, teamwork, and creativity in the kitchen.
22. Exploring Global Twists on the Recipe
Take your peanut butter blossom bars on a world tour by incorporating flavours and ingredients inspired by different cuisines.
Adding Spices
- Cardamom: Adds a floral and slightly spicy note, inspired by Middle Eastern desserts.
- Cinnamon and Nutmeg: Create a warm, comforting flavour reminiscent of autumn in the United States.
- Chilli Powder: For a Mexican twist, a hint of chilli can provide an unexpected kick.
Local Ingredients
- Coconut: Sprinkle shredded coconut over the bars for a tropical touch.
- Sesame Seeds: Replace chocolate with tahini swirls for a nutty Middle Eastern-inspired bar.
- Matcha Powder: Add a hint of green tea powder to the batter for an earthy Japanese twist.
23. Transforming Blossom Bars into Sandwiches
For an extra indulgent treat, turn your bars into layered sandwiches.
How to Create Sandwich Bars
- Slice the bars into rectangles and spread ganache, peanut butter, or cream cheese frosting on one side.
- Place another bar on top, chocolate side facing out, to create a dessert sandwich.
Stacked Desserts
Transform your bars into a mini dessert tower by layering bars with whipped cream or mousse. Decorate with chocolate shavings or fruit for an elegant finish.
24. Peanut Butter and Jelly Blossom Bars
Take the classic peanut butter and jelly combo and incorporate it into your bars.
Swirling Jam into the Dough
- Before baking, drop spoonfuls of jam (e.g., strawberry, raspberry, or grape) onto the batter.
- Use a skewer or knife to gently swirl the jam through the dough for a marbled effect.
Pairing Jam Flavours
- Classic: Grape or strawberry jam for a nostalgic PB&J vibe.
- Unique: Apricot, blackcurrant, or fig jam for a gourmet twist.
The jam adds bursts of fruity sweetness that beautifully complement the peanut butter.
25. Creating a No-Bake Version of Blossom Bars
If you’re short on time or prefer an oven-free recipe, no-bake versions are a fantastic alternative.
No-Bake Base
- Combine peanut butter, oats, honey, and a touch of melted butter to create a firm base.
- Press the mixture into a lined pan and refrigerate until set.
Topping Options
- Melt chocolate and spread it over the chilled base for a glossy finish.
- Sprinkle crushed nuts, shredded coconut, or even freeze-dried fruits for extra texture.
No-bake bars are quick, easy, and perfect for warm days when you want to avoid turning on the oven.
26. Incorporating Peanut Butter Blossom Bars into Desserts
These bars are not just standalone treats; they can be repurposed into other desserts for added creativity.
As a Crust
- Crumble the bars and press them into the bottom of a springform pan to create a rich cheesecake base.
- Use them as a crust layer for trifles or layered puddings.
As Toppings
- Break the bars into small chunks and sprinkle them over ice cream sundaes or milkshakes.
- Use crushed bars as a topping for cupcakes or brownies.
27. Packaging Bars as Gifts
Homemade peanut butter blossom bars make thoughtful and delicious gifts.
Creative Wrapping Ideas
- Wrap individual bars in parchment paper, secured with colourful ribbons.
- Use small gift boxes lined with decorative tissue paper to display a batch of bars.
Labelling Tips
- Include a handwritten label with the name of the dessert and a short description, such as “Homemade Peanut Butter Blossom Bars with Chocolate Topping.”
- Add a note about storage instructions to ensure the recipient enjoys them at their best.
28. Pairing Peanut Butter Blossom Bars with Drinks
The rich, nutty flavour of the bars pairs beautifully with a variety of beverages.
Best Drink Pairings
- Tea: Earl Grey or chai tea adds aromatic complexity that contrasts with the peanut butter.
- Coffee: A cup of black coffee or a latte cuts through the sweetness, balancing the flavours.
- Milk: A classic pairing for kids and adults alike, milk complements the creamy peanut butter perfectly.
- Hot Cocoa: For a decadent treat, enjoy the bars with a mug of creamy hot chocolate.
29. Miniature Blossom Bites
For parties or bite-sized indulgence, create mini peanut butter blossom bites.
How to Make Them
- Use a mini muffin tin to bake smaller portions of the batter.
- Adjust baking time to 10–12 minutes, as smaller portions cook faster.
- Top each mini bar with a single chocolate chip or smaller candy for a proportional topping.
Miniature versions are ideal for finger food at events or as a snack-sized treat for little ones.
30. Conclusion: The Versatility of Peanut Butter Blossom Bars
Peanut butter blossom bars are a must-try dessert, thanks to their rich flavour, endless customisation options, and simplicity. Whether you’re adding global twists, transforming them into layered desserts, or scaling the recipe for a crowd, these bars are endlessly versatile.
Final Tips
- Experiment with flavours and mix-ins to create unique variations.
- Always use high-quality ingredients for the best results.
- Don’t be afraid to get creative—these bars are a blank canvas for your imagination.
From their kid-friendly appeal to their potential as elegant gifts, peanut butter blossom bars are a dessert that keeps on giving. They’re a treat that truly adapts to every occasion and preference.
Thank you for exploring this comprehensive guide. Whether you stick to the classic recipe or try one of these innovative ideas, your peanut butter blossom bars are sure to delight. Enjoy your baking adventures!
