Introduction
The Dash Egg Cooker has quickly become a favorite for people who want perfect eggs without the hassle. Whether you’re a busy professional or a brunch enthusiast, this handy gadget simplifies egg preparation. From soft-boiled to hard-boiled, poached, or even omelets, it’s got you covered. But how do you use it correctly? Are there tips for getting the best results? This article answers all those questions and more, providing detailed Dash egg cooker instructions to ensure you get the most out of your appliance.
We’ll walk you through setup, cooking tips, troubleshooting common issues, and even fun recipes to try. By the end, you’ll be a Dash Egg Cooker pro, impressing friends and family with your perfectly cooked creations.
Part 1: Introduction to the Dash Egg Cooker
Overview of the Dash Egg Cooker
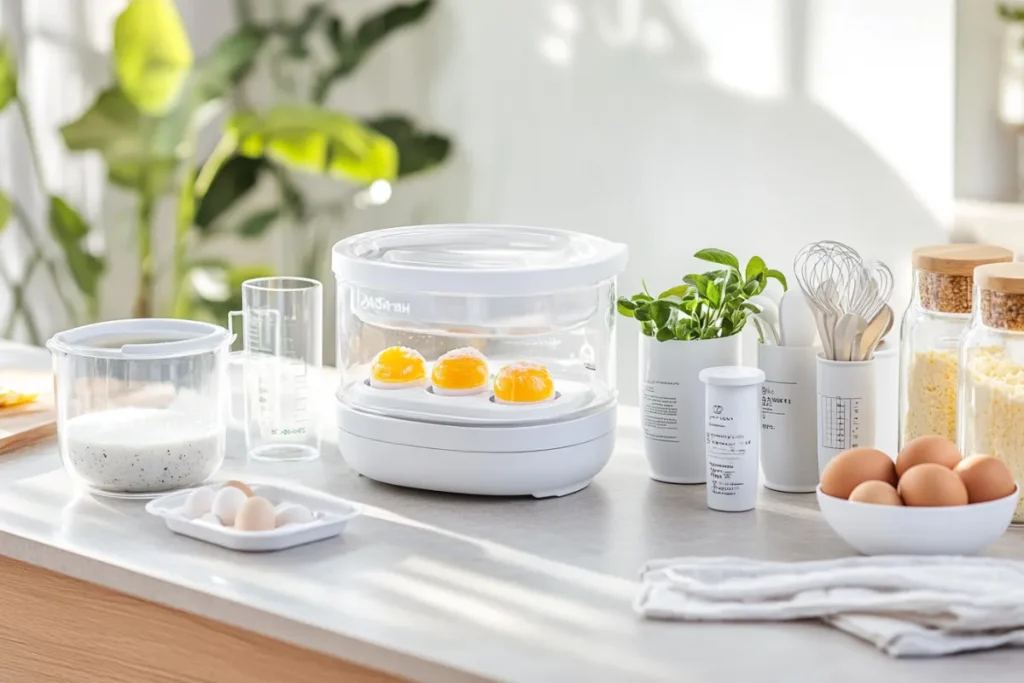
The Dash Egg Cooker is a compact and versatile appliance designed to make egg preparation easier and faster. Its clever use of steam ensures evenly cooked eggs every time, making it ideal for anyone who struggles with timing when boiling eggs on a stove. This user-friendly device is perfect for everything from weekday breakfasts to weekend brunches. With its simple design and clear instructions, it’s accessible to cooks of all levels.
Benefits of Using an Egg Cooker
Why opt for an egg cooker instead of traditional methods? Here are some standout benefits:
- Saves time: No more standing over a pot of boiling water, checking if your eggs are ready. The Dash Egg Cooker automates the process.
- Consistent results: Whether you like your eggs soft, medium, or hard-boiled, this gadget delivers precision every time.
- Versatile options: You’re not limited to boiled eggs. Poach eggs, make omelets, or even steam veggies with this handy appliance.
The Dash Egg Cooker is also compact, making it a great fit for smaller kitchens or dorm rooms.
Models Available
Dash offers several models to suit different needs:
- Dash Rapid Egg Cooker: The basic model for quick, reliable cooking.
- Dash Deluxe Egg Cooker: A larger version with added features for steaming vegetables and cooking bigger batches.
- Dash Express Egg Cooker: A budget-friendly option for singles or couples.
Choosing the right model depends on your lifestyle and cooking habits, but all come with the same promise of simplicity and consistency.
Part 2: Getting Started with Your Dash Egg Cooker
Unboxing and Components
When you first unbox your Dash Egg Cooker, you’ll find several components designed for various cooking methods. These typically include:
- Main Body: The base unit containing the heating element.
- Lid: A transparent cover that allows you to monitor the cooking process.
- Boiling Tray: Holds eggs upright for boiling.
- Poaching Tray: Designed for poaching eggs.
- Omelette Bowl: Used for preparing omelettes.
- Measuring Cup: Essential for adding the correct amount of water; often features a built-in egg piercer.
Familiarizing yourself with these parts will make following the Dash egg cooker instructions straightforward and ensure optimal results.
Initial Setup
Before using your egg cooker for the first time, it’s important to perform a few preparatory steps:
- Clean All Removable Parts: Wash the lid, trays, and measuring cup with warm, soapy water, then rinse and dry thoroughly.
- Wipe the Main Body: Use a damp cloth to gently clean the base unit; avoid submerging it in water.
- Assemble the Cooker: Place the boiling tray onto the heating plate, ensuring it’s properly seated.
- Check the Measuring Cup: Note the water level markings for different egg types (soft, medium, hard) and the built-in egg piercer at the bottom.
By completing these steps, you’ll ensure your appliance is clean and ready for use, setting the stage for perfectly cooked eggs.
Safety Precautions
To use your Dash Egg Cooker safely, keep the following tips in mind:
- Read the Manual: Always refer to the manufacturer’s instructions for specific safety information.
- Use on a Stable Surface: Place the cooker on a flat, heat-resistant surface away from flammable materials.
- Avoid Overfilling: Use the measuring cup to add the correct amount of water; overfilling can cause spills.
- Handle with Care: The appliance and its contents become hot during use; use caution when handling to prevent burns.
- Unplug After Use: Always disconnect the cooker from the power source when not in use and before cleaning.
Adhering to these precautions will help prevent accidents and ensure a safe cooking experience.
“Love exploring versatile breakfast ideas? Check out our Fluffy Oat Pancakes Recipe to pair perfectly with your egg dishes.”

Part 3: Dash Egg Cooker Instructions for Perfect Eggs
Measuring Water Levels
Accurate water measurement is crucial for achieving your desired egg consistency. The provided measuring cup has markings indicating the amount of water needed for soft, medium, and hard-boiled eggs.
- Soft-Boiled: Fill to the corresponding line.
- Medium-Boiled: Use the medium line.
- Hard-Boiled: Fill to the hard line.
Pour the measured water directly onto the heating plate. The water amount controls the cooking time, as the cooker turns off automatically when the water evaporates.
Cooking Soft-Boiled Eggs
To prepare soft-boiled eggs:
- Pierce the Eggs: Use the pin on the measuring cup to pierce the larger end of each egg; this prevents cracking during cooking.
- Add Water: Measure and pour the appropriate amount of water onto the heating plate.
- Place Eggs: Position the eggs on the boiling tray with the pierced ends facing up.
- Start Cooking: Cover with the lid, turn on the cooker, and wait for the buzzer to indicate completion.
- Cool and Serve: Once done, transfer the eggs to cold water to halt the cooking process, then enjoy.
Cooking Medium-Boiled Eggs
For medium-boiled eggs, follow the same steps as above, but adjust the water level to the medium line on the measuring cup. This slight increase in water extends the cooking time, resulting in firmer yolks.
Cooking Hard-Boiled Eggs
To achieve hard-boiled eggs:
- Pierce the Eggs: As with other methods, pierce the larger end of each egg.
- Add Water: Fill the measuring cup to the hard line and pour onto the heating plate.
- Place Eggs: Arrange the eggs on the boiling tray, pierced side up.
- Start Cooking: Cover, activate the cooker, and wait for the buzzer.
- Cool and Peel: After cooking, place the eggs in cold water to cool, making them easier to peel.
Poaching Eggs
To poach eggs:
- Add Water: Fill the measuring cup to the poached/omelette line and pour onto the heating plate.
- Prepare the Tray: Lightly grease the poaching tray to prevent sticking.
- Add Eggs: Crack an egg into each section of the poaching tray.
- Assemble and Cook: Place the poaching tray on the boiling tray, cover with the lid, and start the cooker.
- Serve: Once the buzzer sounds, carefully remove the poached eggs and serve immediately.
Making Omelets
To make an omelet:
- Add Water: Use the measuring cup to pour water to the poached/omelette line onto the heating plate.
- Prepare the Bowl: Grease the omelet bowl with a bit of oil or cooking spray.
- Add Egg Mixture: Beat eggs and pour into the omelet bowl; you can add fillings like cheese or vegetables.
- Assemble and Cook: Place the omelet bowl on the boiling tray, cover, and start the cooker.
- Serve: After the buzzer sounds, remove the omelet and enjoy.
“If you’re into creative kitchen solutions, don’t miss our guide on How to Minimize Leftover Waste and keep your cooking efficient.”
Part 4: Tips and Tricks for Optimal Use
Preventing Cracked Eggs
To avoid cracked eggs during cooking, it’s essential to pierce the larger end of each egg with the pin provided on the measuring cup. This small puncture allows steam to escape, preventing pressure buildup that can cause cracking. Additionally, using room-temperature eggs can reduce the likelihood of cracks, as they are less prone to temperature shock when exposed to heat. citeturn0search24
Achieving Desired Egg Consistency
The key to obtaining your preferred egg consistency lies in accurate water measurement. Always use the measuring cup to add the correct amount of water corresponding to soft, medium, or hard-boiled eggs. Remember, the water level determines the cooking time, as the cooker automatically shuts off when the water evaporates. For consistent results, ensure the eggs are placed with the pierced side facing up and avoid overcrowding the tray.
Easy Peeling Techniques
For hassle-free peeling, immediately transfer the cooked eggs into a bowl of ice water after cooking. This rapid cooling process causes the egg whites to contract slightly, creating a gap between the egg and the shell, making peeling easier. Let the eggs sit in the ice water for about 5 minutes before peeling. citeturn0search0
Part 5: Cleaning and Maintenance of Your Dash Egg Cooker
Post-Use Cleaning
Proper cleaning after each use ensures the longevity and performance of your Dash Egg Cooker. Follow these steps:
- Unplug the Cooker: Always disconnect the appliance from the power source and allow it to cool completely before cleaning.
- Disassemble Removable Parts: Remove the lid, boiling tray, poaching tray, and measuring cup.
- Wash Components: Clean the removable parts with warm, soapy water using a soft sponge. Rinse thoroughly and dry with a clean cloth.
- Clean the Heating Plate: Wipe the heating plate gently with a damp cloth to remove any residue. Avoid using abrasive cleaners or immersing the base in water, as this can damage the electrical components. citeturn0search1
Descaling the Heating Plate
Over time, mineral deposits from water can accumulate on the heating plate, affecting performance. To descale:
- Prepare a Solution: Mix equal parts of water and white vinegar.
- Apply to Heating Plate: Pour the solution onto the heating plate and let it sit for about 10 minutes.
- Wipe Clean: Use a soft cloth to wipe away the loosened deposits. Rinse the area with a damp cloth and dry thoroughly.
Regular descaling, performed monthly or as needed based on usage, will maintain the efficiency of your egg cooker. citeturn0search1
Storing the Appliance
After cleaning:
- Ensure Complete Dryness: Make sure all parts are completely dry to prevent mold or mildew.
- Reassemble: Put the components back together to keep them organized and protect them from damage.
- Store Safely: Place the egg cooker in a cool, dry place away from direct sunlight or moisture.
By following these cleaning and maintenance tips, you’ll extend the lifespan of your Dash Egg Cooker and ensure it continues to function optimally.
Part 6: Troubleshooting Common Issues
Cooker Not Turning On
If your Dash Egg Cooker isn’t turning on, don’t panic—it might be a simple fix. Here are a few common causes and solutions:
- Check the Power Connection: Ensure the appliance is plugged securely into a working outlet. If the socket is faulty, try another one.
- Inspect the Power Cord: Look for any visible damage to the cord. A damaged cord should be replaced immediately for safety.
- Verify the Assembly: Make sure all parts, like the boiling tray and lid, are assembled correctly. Some models won’t function unless properly set up.
If none of these steps work, consult the user manual or contact Dash’s customer support for assistance. Following the Dash egg cooker instructions provided in the manual can often prevent these issues.
Undercooked or Overcooked Eggs
Getting undercooked or overcooked eggs despite following the water measurements? Here are some tips to ensure consistent results:
- Recalibrate Water Levels: Sometimes, slight variations in water quality or egg size can affect cooking. Adjust water levels incrementally for better results.
- Check Egg Placement: Always position eggs with the pierced side facing up. Uneven placement may lead to inconsistent cooking.
- Ensure the Lid Fits Securely: A loose lid can cause steam to escape, altering cooking time and results.
By troubleshooting these aspects, you can resolve most issues and enjoy perfectly cooked eggs every time.
Buzzer Not Sounding
If the buzzer doesn’t sound when the cooking cycle ends, it might be due to:
- Electrical Issues: Confirm that the cooker is properly plugged in and the outlet is functioning.
- Faulty Buzzer: If the buzzer fails repeatedly, contact customer service for a replacement.
- Manual Timer Needed: For older models, you may need to rely on a kitchen timer for precise results.
Being attentive to these details ensures a smoother cooking experience.

Part 7: Exploring Additional Recipes
Steamed Vegetables
Did you know your Dash Egg Cooker can double as a steamer? Here’s how to use it for vegetables:
- Add Water: Fill the heating plate with water up to the steaming line.
- Prepare the Veggies: Wash and cut vegetables like broccoli, carrots, or asparagus into bite-sized pieces.
- Place on the Tray: Arrange the vegetables evenly on the boiling tray.
- Cook and Serve: Start the cooker and let it steam until the buzzer sounds. Season and serve immediately.
This feature is perfect for quick, healthy side dishes.
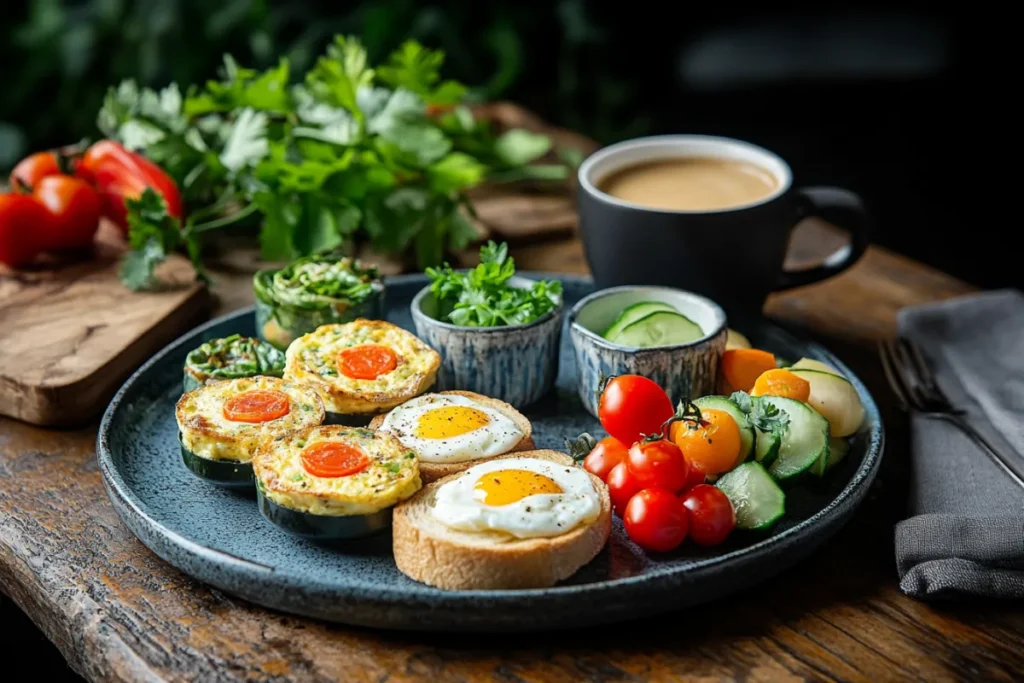
Mini Frittatas
For a protein-packed breakfast, try making mini frittatas:
- Prepare the Egg Mixture: Beat eggs with milk, salt, and pepper. Add diced vegetables, cheese, or cooked meat.
- Grease the Poaching Tray: Lightly oil the tray to prevent sticking.
- Add Mixture to the Tray: Pour the egg mixture into each section of the poaching tray.
- Cook: Place the tray in the cooker, add water to the heating plate, and start the cycle.
- Serve: Once cooked, carefully remove the frittatas and enjoy.
Simple Desserts
Surprisingly, the Dash Egg Cooker can even help with desserts. Try these easy recipes:
- Steamed Custards: Mix eggs, milk, and sugar, then steam in ramekins using the poaching tray.
- Mini Cheesecakes: Use graham cracker crumbs for the crust, add a cream cheese mixture, and steam for a no-bake treat.
These recipes showcase the versatility of your egg cooker, making it more than just an appliance for eggs.
Part 8: Frequently Asked Questions
How much water should I use for hard-boiled eggs?
The amount of water you use in your Dash Egg Cooker is critical to achieving the perfect consistency. For hard-boiled eggs, fill the measuring cup to the “hard” line and pour it onto the heating plate. This water level ensures enough steam is generated to cook the eggs thoroughly. Always refer to the Dash egg cooker instructions included in your manual for exact measurements, as some models might vary slightly.
Can I cook more than six eggs at a time?
Yes, but this depends on the model of your Dash Egg Cooker. While the basic model accommodates six eggs, larger versions like the Dash Deluxe can cook up to 12 eggs simultaneously. If you’re cooking for a crowd, investing in a larger model might be a good idea. Regardless of the number of eggs, always follow the recommended water levels to ensure consistent results.
Is the Dash Egg Cooker dishwasher safe?
The removable parts of the Dash Egg Cooker—like the lid, boiling tray, and measuring cup—are typically dishwasher safe. However, always check your manual to confirm. The main body containing the heating plate should never be submerged in water or placed in a dishwasher. Instead, wipe it with a damp cloth after each use. Proper cleaning will keep your appliance in top shape for years to come.
How long does it take to cook poached eggs?
Poaching eggs in the Dash Egg Cooker takes about 7-9 minutes, depending on the water level and desired consistency. Add water to the “poached/omelette” line, lightly grease the poaching tray, and crack the eggs into the compartments. Cover and start the cooker, then wait for the buzzer to signal that your eggs are ready. For more detailed steps, consult your Dash egg cooker instructions to ensure perfect results every time.
“Interested in experimenting with new recipes? Our Master French Crepes Recipes are the perfect challenge for any kitchen enthusiast.”
Part 9: Conclusion and Final Thoughts
Recap of Key Points
Mastering the Dash Egg Cooker is simple when you follow the right steps. From measuring water levels correctly to exploring its versatility with recipes like mini frittatas or steamed vegetables, this appliance is a game-changer for anyone who enjoys perfectly cooked eggs. We’ve covered setup, cleaning, troubleshooting, and additional uses, ensuring you have everything you need to make the most of your egg cooker.
Encouragement to Experiment
While this guide provides a comprehensive overview, the possibilities don’t end here. Experimenting with your Dash Egg Cooker can lead to exciting new recipes and techniques. Whether it’s trying different egg dishes or using the cooker for non-traditional recipes like desserts, there’s always room for creativity.
For even more ideas, check out our recipe collection on YourRecipes. You’re bound to find inspiration to make the most of this handy kitchen tool!

