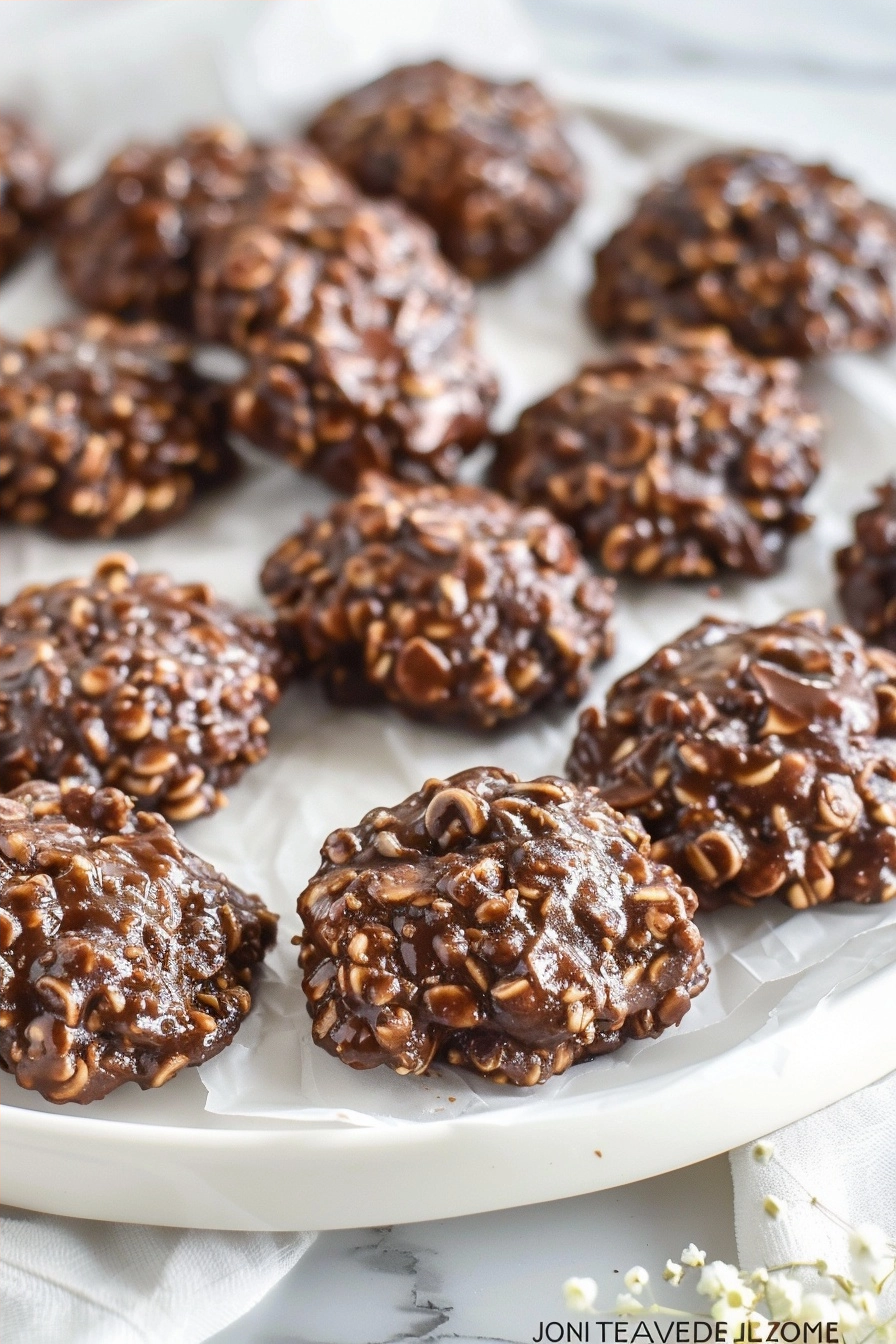
Gluten-Free No Bake Cookies (Dairy-Free) provide a quick and delicious solution for those managing dietary restrictions who crave chocolate and oats. These classic treats combine creamy nut butter, cocoa powder, and certified gluten-free oats into a seamless, fudge-like consistency without requiring an oven. You will appreciate the straightforward preparation method that delivers a chewy, satisfying snack every single time.
| Metric | Details |
|---|---|
| Prep Time | 10 minutes |
| Cook Time | 5 minutes |
| Total Time | 45 minutes |
| Servings | 12 cookies |
| Difficulty | Easy |
| Cuisine | American |
Why This Recipe Works
This recipe works because it relies on the natural binding properties of nut butter and melted coconut oil, replacing traditional butter and grains effortlessly. I have refined the ratio of cocoa to sweetener to ensure that the texture remains firm after cooling rather than becoming chalky or oily. The result is a perfect balance of deep cocoa flavor and nutty notes that appeals to children and adults alike.
You will love how quickly these come together on the stovetop, making them ideal for last-minute cravings or summer gatherings when turning on the oven is not an option. By using high-quality ingredients, you transform simple pantry staples into a sophisticated, allergy-friendly dessert. This is a reliable go-to recipe that maintains consistency regardless of the environment.
Ingredients
| Ingredient | Quantity | Notes |
| Certified GF Oats | 3 cups | Use quick-cooking oats |
| Almond Butter | 1 cup | Ensure it is creamy |
| Coconut Oil | 1/2 cup | Refined or unrefined |
| Maple Syrup | 2/3 cup | Pure grade A preferred |
| Cocoa Powder | 1/2 cup | Unsweetened |
| Vanilla Extract | 1 tsp | Pure extract |
Step-by-Step Instructions
Mixing the Base
- Combine the coconut oil, maple syrup, cocoa powder, and almond butter in a medium saucepan.
- Heat the mixture over medium heat until it reaches a low simmer, stirring continuously.
- Whisk the mixture for exactly two minutes to ensure the sugars dissolve and the chocolate emulsifies.
Forming the Cookies
- Remove the saucepan from the heat source promptly to prevent burning the chocolate base.
- Stir in the vanilla extract until fully incorporated into the smooth dark liquid.
- Fold the gluten-free oats into the mixture until every oat is coated in the chocolate.
- Scoop rounded tablespoons of the batter onto a prepared parchment-lined baking sheet.
Chef Tips for Perfect Results
- Measure your oats carefully to avoid a dry, crumbly texture that fails to hold its shape.
- Allow the mixture to cool for two minutes before scooping to help the cookies set faster.
- Use smooth, salted nut butter to enhance the flavor profile and provide natural stability to the dough.
- Keep the cookies in the freezer for the first 20 minutes to lock in the final shape.
- Store them in the coldest part of your refrigerator to prevent the coconut oil from softening.
Common Mistakes to Avoid
Cooking the mixture for too long will result in dry, brittle cookies that crumble upon sight. Fix this by using a kitchen timer and removing the pot from heat as soon as the small bubbles appear. Another mistake is using old or stale oats, which ruins the texture. Always use fresh, sealed oats for the best mouthfeel and structure. Failing to use parchment paper leads to sticking, so ensure you have a barrier between the tray and the cookie batter.
Variations and Substitutions
| Ingredient | Substitution | Impact on Flavor |
| Almond Butter | Sunflower Seed Butter | Nut-free option with earthier taste |
| Maple Syrup | Agave Nectar | Neutral sweetness with slightly thinner consistency |
| Coconut Oil | Vegan Butter | Creamier mouthfeel with a savory undertone |
Serving Suggestions and Pairings
Serve these gluten-free cookies alongside a glass of unsweetened almond milk for a classic afternoon snack. They pair exceptionally well with fresh berries like strawberries or raspberries, which cut through the richness of the chocolate. Consider serving these at summer picnics or healthy living events where dietary-conscious guests appreciate a reliable, indulgent treat. They are also perfect for school lunch packs once you confirm the nut-free policies of the facility.
Storage and Reheating
| Method | Duration | Instructions |
| Refrigerator | 1 week | Store in a sealed airtight container |
| Freezer | 3 months | Flash freeze on a tray then move to a bag |
Nutritional Information
| Nutrient | Amount per Serving |
| Calories | 185 kcal |
| Total Fat | 12g |
| Carbohydrates | 18g |
| Protein | 4g |
| Fiber | 2g |
Approximate values.
Frequently Asked Questions
Can I use rolled oats instead of quick oats?
You can use rolled oats, though the texture of the cookies will be heartier and chewier rather than smooth. Pulse the rolled oats in a food processor a few times if you prefer a finer grain size.
How do I fix cookies that are not setting?
Cookies that fail to set are usually the result of insufficient boiling time or excess moisture in the nut butter. Place the tray in the freezer for an additional hour to firm up the coconut oil base.
Are these suitable for a keto diet?
This recipe contains maple syrup, which is a natural sugar, so it is not strictly keto-friendly as written. You can substitute the sweetener with a granulated sugar-free monk fruit blend to accommodate low-carb requirements.
Can I make these treats in advance?
You should make these at least two hours before serving to ensure they reach the appropriate firm temperature. They taste best when refrigerated overnight, allowing the flavors to meld perfectly.
What if my mixture is too dry?
A dry mixture generally indicates that the ratio of oats to liquid was too high during the folding process. Add one tablespoon of warm water or additional nut butter to help bind the loose oats together.
Conclusion
Mastering these Gluten-Free No Bake Cookies (Dairy-Free) gives you a dependable snack that accommodates various dietary needs without sacrificing quality. These cookies offer a robust cocoa flavor profile that satisfies the most intense cravings while remaining perfectly portable. By following these steps, you ensure consistent, delicious results for any occasion. Keep this recipe handy for those moments when you need a quick, chocolatey fix that fits your healthy lifestyle. Experience the perfect blend of texture and authentic cocoa richness in every single bite.